


















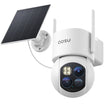
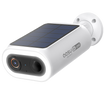
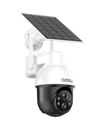
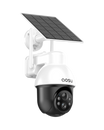









A dependable camera mount requires a suitable substrate, documented fixings and a checked drilling route. Concrete appearance alone does not establish that a proposed installation is safe or suitable.
What You'll Need
- Fixings approved for the actual substrate, bracket and exposure conditions
- The drill, bit and depth-control method specified by the fixing manufacturer
- Level and marker or pencil
- The specified setting or driving tools
- Manufacturer-compatible drilling dust collection
- Suitable HEPA-filtered hole-cleaning equipment and specified cleaning accessories
- Eye, hearing and task-appropriate respiratory protection
Dust collection and the fixing’s complete specified hole-cleaning procedure must both be satisfied. Do not substitute vacuuming for additional cleaning steps required by the fixing manufacturer.
Step 1: Check the Structure Before Choosing Drill Points
Confirm whether the surface is solid concrete, concrete block, a thin panel or another construction. Do not apply solid-concrete fixing instructions to every cement-colored surface.
Check available building information and locate concealed services and reinforcement using an appropriate assessment. A detector reading alone does not guarantee a clear drilling path.
Stop and obtain qualified help if the construction is unknown, may contain prestressing tendons, or the proposed holes are near reinforcement, services, cracks, edges or damaged areas.
Once the location is suitable for fixing, test the camera view, power and connection. Follow the exact camera’s mounting-height guidance.
Step 2: Mark the Drill Holes
Confirm the structure and assessed drilling route before marking. Hold the bracket at the approved fixing position, use a level and mark its hole pattern. Recheck the camera angle and alignment.
Confirm the selected fixing’s permitted edge distance, spacing, substrate thickness and exposure conditions before finalizing the marks. If the bracket pattern cannot meet those requirements, change the mounting arrangement rather than moving holes arbitrarily.
Step 3: Drill into Concrete
Use the drill type, bit diameter and hole depth specified for the exact fixing and substrate. Hole depth is based on the required embedment and any additional clearance—not simply the screw’s total length.
Account for bracket thickness and follow the specified drilling and dust-control procedure. Stop if unexpected metal, a void or another obstruction is encountered.
Step 4: Clean Holes With Controlled Dust Collection
Concrete drilling can release respirable crystalline silica. Use a drilling dust-control system suited to the tool and task, and clean holes using the fixing manufacturer’s specified procedure with appropriate dust capture.
Do not blow dust out with your mouth or disperse it into the surrounding area. If the selected fixing requires a cleaning process you cannot carry out with suitable exposure controls, obtain qualified help.
Review OSHA’s drilling dust-control guidance. Eye protection and task-appropriate respiratory protection do not replace effective dust control.
This is U.S. occupational construction guidance, not a determination that a household installation satisfies legal requirements.
Step 5: Attach the Mount
Install the selected anchors or concrete screws exactly as instructed. Do not assume that every anchor should be tapped flush or tightened using the same method.
Follow the stated embedment, setting procedure and torque or driving limits. Do not use hammer-drilling mode to tighten fasteners unless explicitly required by the fastening system.
A spinning fixing, cracked substrate, oversized hole or unstable bracket needs assessment. Do not improvise with packing material or substitute hardware.
Step 6: Check Weather Protection and Saved Footage
Follow the camera and building-envelope instructions for exterior penetrations, cable entries, gaskets and compatible sealants. Do not block drainage paths or assume that an outdoor-rated camera makes every cable connection weatherproof.
Confirm bracket stability and accessible maintenance space. Then test detection, saved recordings and night lighting from the final position.
Recheck the installation according to the mount and fixing manufacturer’s inspection guidance, especially if movement, cracking or water entry appears.

Safety Tips
- Stop when the construction or drilling route remains uncertain; small holes are not automatically harmless.
- Do not cut or drill through reinforcement, prestressing tendons or concealed services.
- Use suitable drilling dust collection and controlled hole cleaning. Personal protective equipment does not replace dust control.
- Follow the exact fixing’s substrate, drilling, cleaning and installation requirements rather than a universal hammer-drill or wall-plug rule.
Common Mistakes to Avoid
- Choosing fixings before confirming the substrate and bracket requirements
- Skipping concealed-object assessment
- Using screw total length as the hole-depth specification
- Omitting prescribed hole-cleaning steps or dispersing drilling dust
- Ignoring edge distances, spacing, setting limits or weather protection
A loose fixing, damaged substrate or water entry needs assessment rather than improvised repair.
To Wrap Up
A dependable concrete installation starts before drilling: confirm the structure, concealed objects and selected fixing’s requirements. Control dust, complete the specified installation and verify weather protection and saved footage.
If the surface is not confirmed solid concrete, return to the mounting-material guide before choosing a method.
FAQs About Mounting a Security Camera on Concrete
Can I mount a camera on concrete?
Yes, when the substrate, fixing, bracket and installation conditions are suitable. Confirm the exact requirements before drilling.
Can drilling damage concrete or concealed components?
Yes. Small holes are not automatically harmless. Unknown construction, reinforcement, prestressing tendons or concealed services require further assessment.
Can I avoid drilling?
Use only a mount approved for the actual surface, equipment weight and exposure. Smooth appearance alone does not establish adhesive compatibility or a dependable attachment.